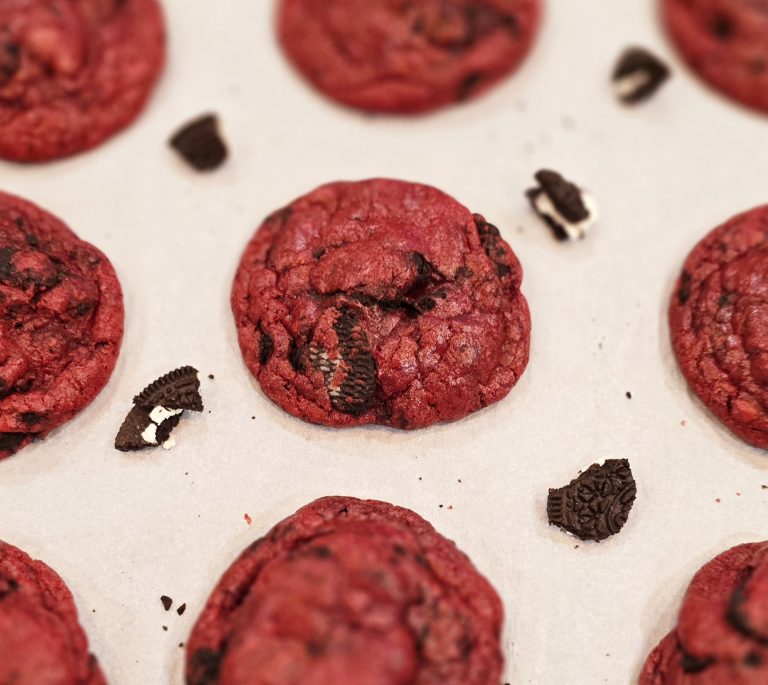
Hi there, sweet friends! Today, I’m so excited to share one of my absolute favorite cookie recipes that I made for the holidays last year. It was such a hit with my family and friends that I knew I just had to write it down and pass it along to all of you. These Red Velvet Oreo Cookies are soft, chewy, and packed with chunks of Oreos that add the perfect crunch and chocolatey surprise in every bite.
Red velvet cookies are a delightful twist on the classic red velvet cake, offering that same rich cocoa flavor with a hint of tanginess from the vinegar. Their vibrant red hue makes them perfect for festive occasions, but they’re so delicious that you’ll want to make them year-round. The combination of soft, buttery dough and crunchy Oreos makes every bite a decadent treat, while the cocoa powder and food coloring give these cookies their signature red velvet flavor and color.
These cookies are more than just pretty—they deliver big on taste and texture. The Oreos add a playful crunch that balances perfectly with the soft and chewy cookie base. Whether you’re baking for a holiday party, a cookie exchange, or just because you need something sweet (let’s be real, that’s all of us), these cookies are sure to impress. So let’s dive right in and I’ll show you step-by-step how to make them, along with some tips to make sure they come out perfect every time!

Ingredients and Why We Use Them
- 1/2 cup + 2 tbsp butter (room temperature) – Adds richness and moisture, creating a soft, chewy texture.
- 1/2 cup light brown sugar – Provides a deeper sweetness and helps keep the cookies moist.
- 1/3 cup granulated sugar – Adds sweetness and helps achieve a slightly crisp edge.
- 1 medium egg – Acts as a binding agent and adds structure to the dough.
- 1 tsp vanilla extract – Enhances the flavor with a warm, aromatic sweetness.
- 1 tbsp red food coloring (adjust for deeper color if needed) – Gives the cookies their signature red velvet appearance.
- 1 tsp apple cider vinegar – Adds a slight tanginess that complements the cocoa flavor and helps activate the baking soda for rise.
- 2 1/4 cups all-purpose flour – Provides structure and stability to the dough.
- 2 tbsp unsweetened cocoa powder – Adds a mild chocolate flavor, essential for red velvet.
- 1 1/2 tsp baking powder – Leavens the dough, giving the cookies a light texture.
- 1/2 tsp baking soda – Works with the vinegar for additional lift and softness.
- 1/2 tsp sea salt – Balances sweetness and enhances flavors.
- 15-20 chopped Oreo cookies (reserve some for topping if desired) – Adds crunch, flavor, and a fun twist to traditional red velvet.
Instructions
- Cream the Butter and Sugars
In a large mixing bowl, beat the butter, brown sugar, and granulated sugar together until light and fluffy. This should take about 2–3 minutes with an electric mixer. - Add Wet Ingredients
Next, add the egg, vanilla extract, red food coloring, and apple cider vinegar. Beat everything together until smooth and well combined. (Pro tip: This is where you really see that gorgeous red velvet color come to life!) - Mix Dry Ingredients
In a separate bowl, whisk together the flour, cocoa powder, baking powder, baking soda, and salt. Once combined, gradually add the dry ingredients to the wet ingredients. Stir gently until everything is just mixed. Don’t overwork the dough! - Add the Oreos
Gently fold in the chopped Oreos. Be careful not to crush them too much—we want nice, big chunks for that perfect cookie bite. - Chill the Dough
Now here’s the important step: cover the dough and chill it in the refrigerator for 30 minutes to 1 hour. This helps the cookies keep their shape when baking and allows the flavors to meld beautifully. (Don’t skip this part—patience is key!) - Preheat the Oven
Once your dough is nice and chilled, preheat your oven to 350°F (175°C). Line your baking sheet with parchment paper or a silicone mat. - Scoop and Shape
Weigh out the dough into 65 grams or more if you want bigger cookies, then roll into balls and place them 2 inches apart on the prepared baking sheet. If you want an extra-pretty presentation, press a few more Oreo pieces into the tops of the dough balls before baking. - Bake
Bake the cookies for 12-15 minutes, or until the edges are set but the centers are still soft. Don’t overbake them—they’ll continue to firm up as they cool. - Cool and Enjoy
Let the cookies cool on the baking sheet for 5 minutes, then transfer them to a wire rack to cool completely.
Baking Tips & Notes
- Room Temperature Ingredients: Make sure your butter and egg are at room temperature for smoother mixing and even texture.
- Chilling the Dough: Don’t skip this step! Chilling helps prevent the cookies from spreading too much during baking.
- Measuring Flour Correctly: Spoon the flour into your measuring cup and level it off with a knife to avoid using too much.
- Extra Oreos on Top: Pressing a few extra pieces of Oreo on top before baking not only makes them look bakery-style but also adds a satisfying crunch.
- Storing Cookies: Keep the cookies in an airtight container for up to 5 days. You can also freeze them for up to 3 months.
Nutrition Information (Per Cookie)
- Calories: ~160–180 kcal
- Fat: 8g
- Saturated Fat: 5g
- Carbohydrates: 22g
- Sugar: 12g
- Protein: 2g
- Fiber: 1g
- Sodium: 110mg
Yield
- Makes about 12-16 cookies depending on size.
Red Velvet Oreo Cookies Recipe — Perfect for the Holidays!
12
servings180
kcalSoft and chewy red velvet cookies with a creamy cocoa flavor, loaded with crunchy Oreo chunks for a fun twist on a classic dessert.
Ingredients
1/2 cup + 2 tbsp butter (room temperature)
1/2 cup light brown sugar
1/3 cup granulated sugar
1 medium egg
1 tsp vanilla extract
1 tbsp red food coloring (adjust for deeper color if needed)
1 tsp apple cider vinegar
2 1/4 cups all-purpose flour
2 tbsp unsweetened cocoa powder
1 1/2 tsp baking powder
1/2 tsp baking soda
1/2 tsp sea salt
15-20 chopped Oreo cookies (reserve some for topping if desired)
Directions
- Cream the butter, brown sugar, and granulated sugar together in a large mixing bowl until light and fluffy (2–3 minutes with an electric mixer).
- Add the egg, vanilla extract, red food coloring, and apple cider vinegar, then beat until smooth and well combined.
- In a separate bowl, whisk together the flour, cocoa powder, baking powder, baking soda, and salt.
- Gradually add the dry ingredients to the wet ingredients, stirring gently until just combined (avoid overmixing).
- Fold in the chopped Oreos carefully to maintain large chunks.
- Cover the dough and chill in the refrigerator for 30 minutes to 1 hour.
- Preheat the oven to 350°F (175°C) and line a baking sheet with parchment paper or a silicone mat.
- Weigh and roll the dough into 65-gram balls, placing them 2 inches apart on the baking sheet; optionally, press extra Oreo pieces on top.
- Bake for 12-15 minutes, until edges are set but centers remain soft (do not overbake).
- Let cookies cool on the baking sheet for 5 minutes, then transfer to a wire rack to cool completely.
Notes
- Room Temperature Ingredients: Make sure your butter and egg are at room temperature for smoother mixing and even texture.
- Chilling the Dough: Don’t skip this step! Chilling helps prevent the cookies from spreading too much during baking.
- Measuring Flour Correctly: Spoon the flour into your measuring cup and level it off with a knife to avoid using too much.
- Extra Oreos on Top: Pressing a few extra pieces of Oreo on top before baking not only makes them look bakery-style but also adds a satisfying crunch.
- Storing Cookies: Keep the cookies in an airtight container for up to 5 days. You can also freeze them for up to 3 months.
Final Thoughts
And there you have it! These Red Velvet Oreo Cookies are not only gorgeous but also absolutely delicious. I made these for the holidays, and let me tell you, they were the star of the dessert table. My family and friends couldn’t stop talking about them (or eating them!).
If you try these out, I’d love to hear how they turned out for you! Happy baking, my sweet friends, and may your home be filled with love, laughter, and the smell of freshly baked cookies. ❤️🍪


